The knitting
The next stage was knitting the tension sample, so I could set the stitch and row figures so that my knitleader (primitive shaping device) would allow me to knit pieces exactly the size I planned. I was aware that there would be a lot of ends to finish afterwards and these would in total come to many metres of yarn, so I wanted to keep the wastage to the minimum. The tension sample was knitted, washed and rested overnight and the following day I could actually start knitting.
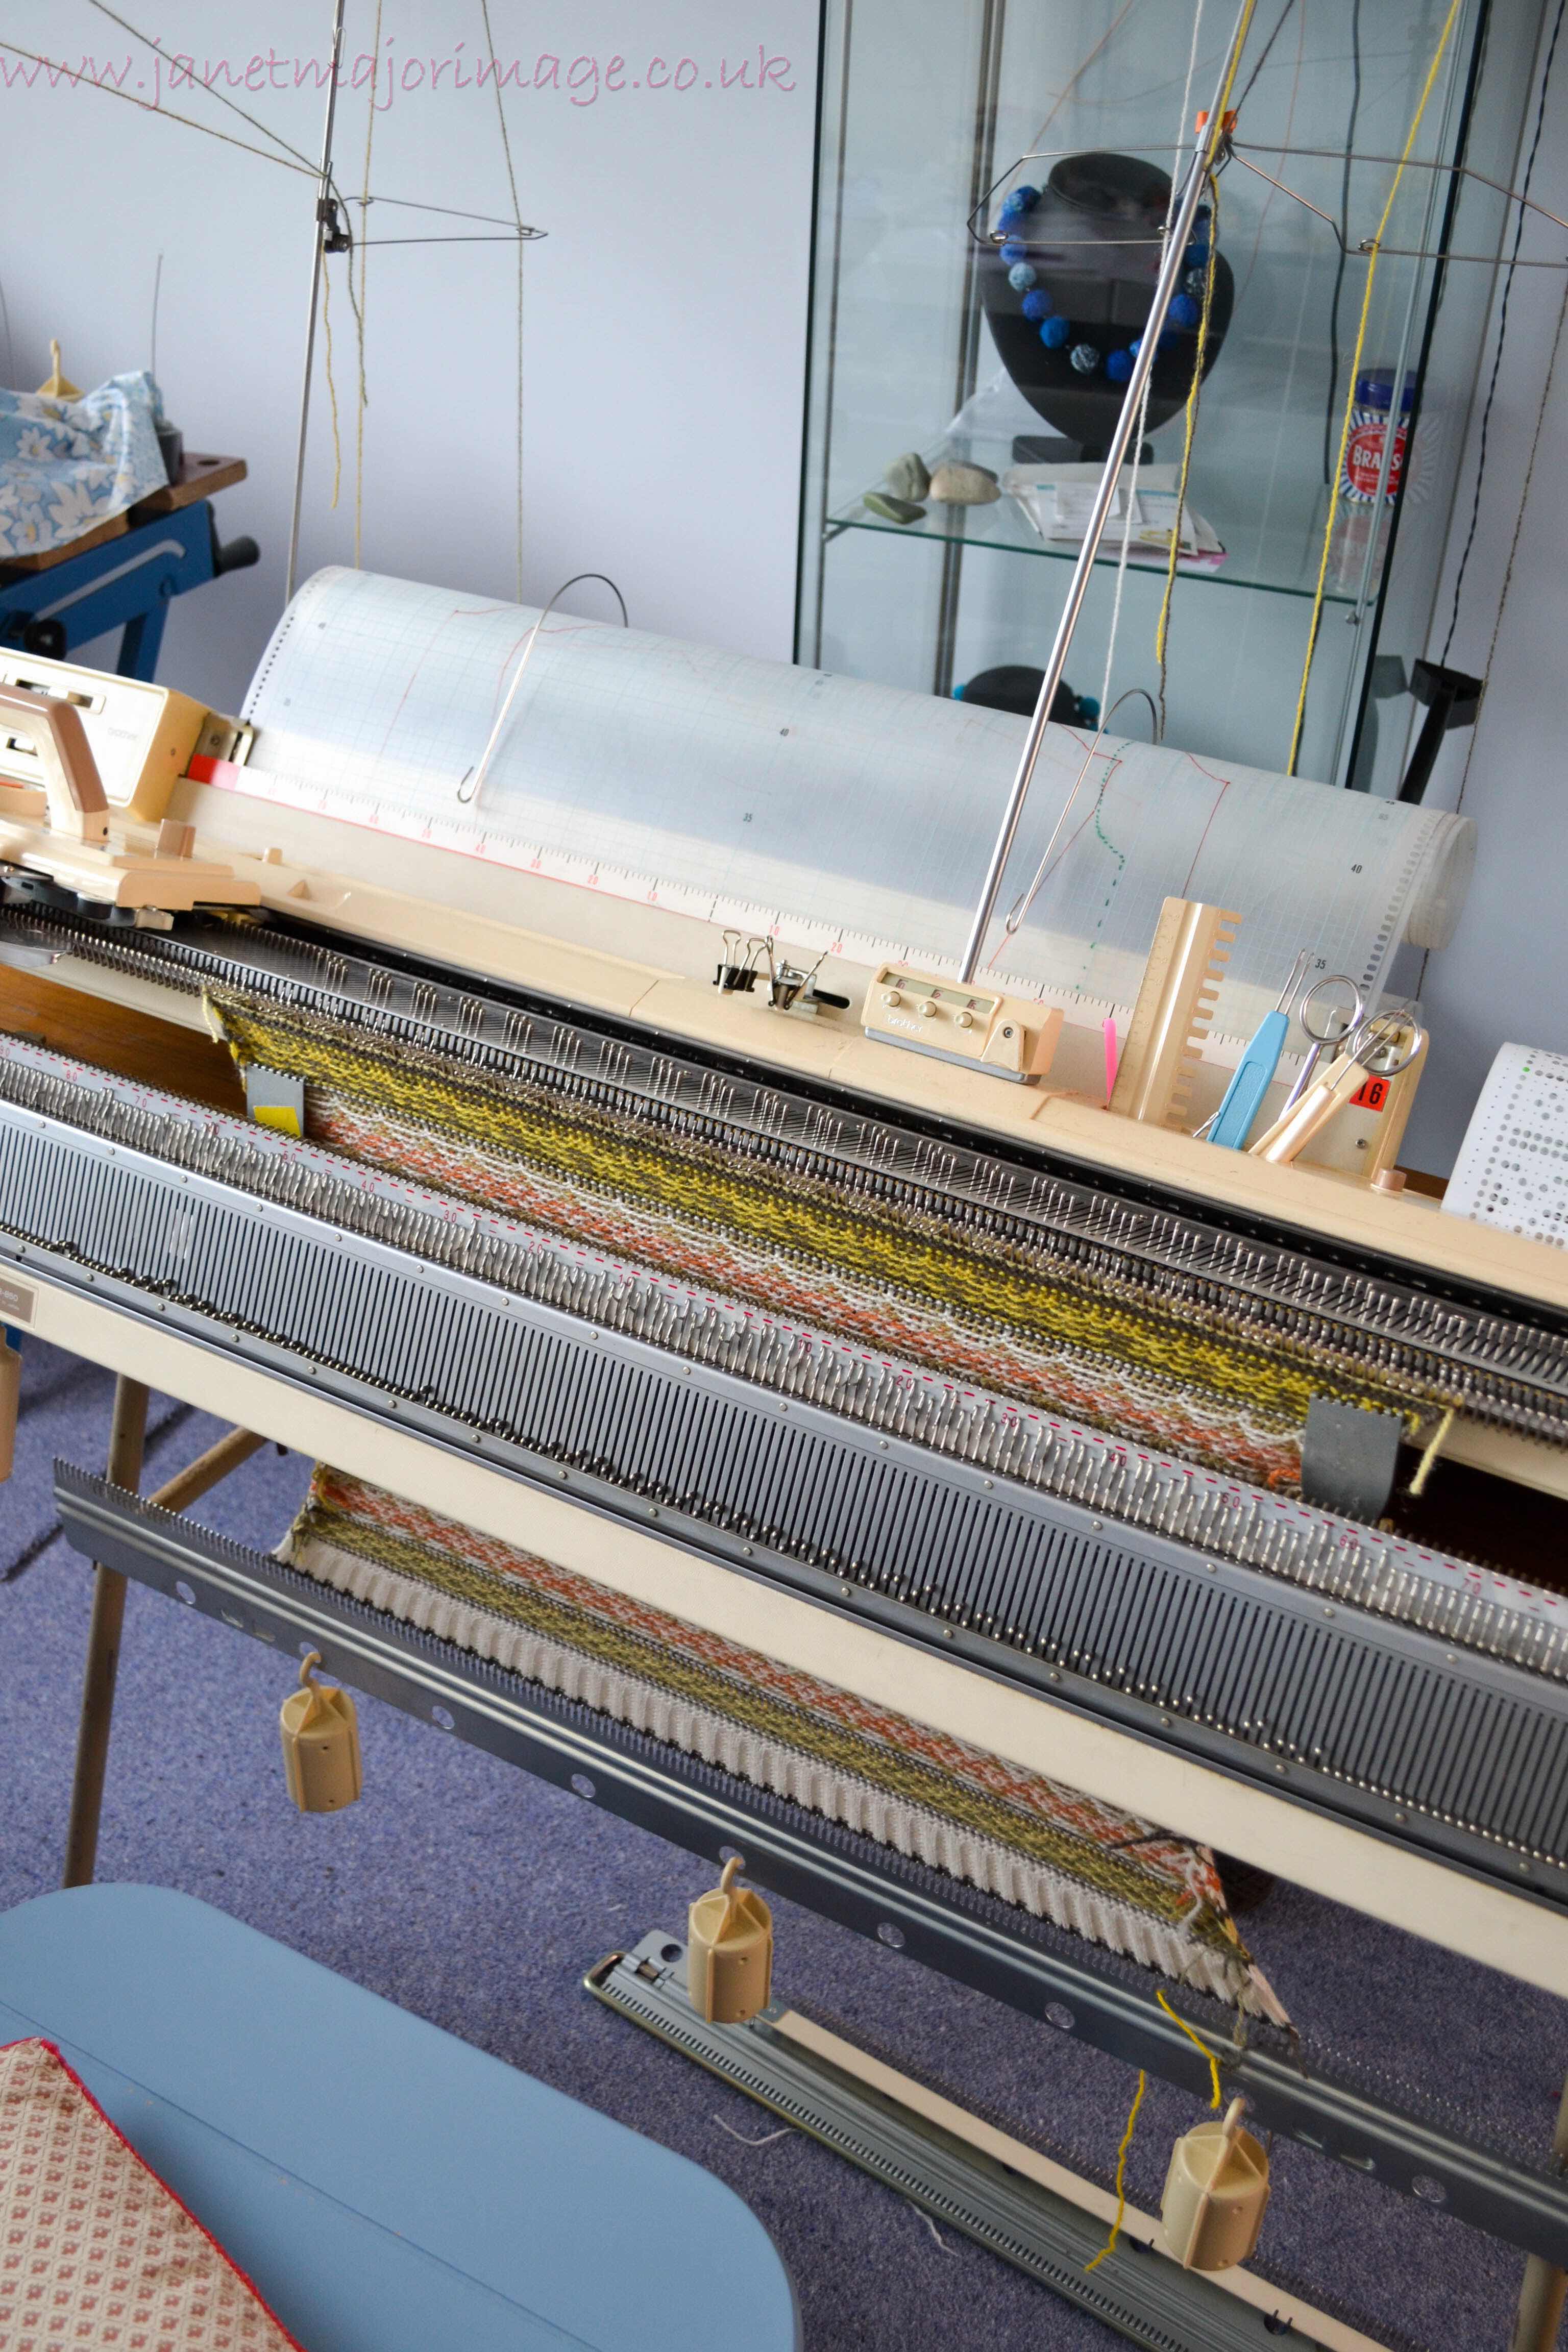
Showing knitting in progress and the shaping device
Please don’t be under the misimpression that knitting with a knitting machine ‘just happens’ or is ‘cheating’. It is a very skilled operation entirely different from hand knitting. I was making it even more complex, juggling 8 yarns including changing the background colour over a pattern repeat of 54 rows. I knitted the sleeves one day, the fronts on the next day and the back another day. These were then washed and blocked to size. I have each pattern piece drawn out on a synthetic fine paper like material so I know I will get the exact size I have set out to knit. (I had already done the planning to ensure the sleeves and backs and fronts lined up horizontally and where the sleeves were set in.) I am a lover of fitted sleeves and not the (to my mind) unflattering drop shoulder line and in a fair isle pattern this takes some planning. The neckband is done by a cut and sew technique, which I have also developed a variation of for hand knitting. The front bands also were knitted separately. I factor in spending as long in the making up as the actual knitting.
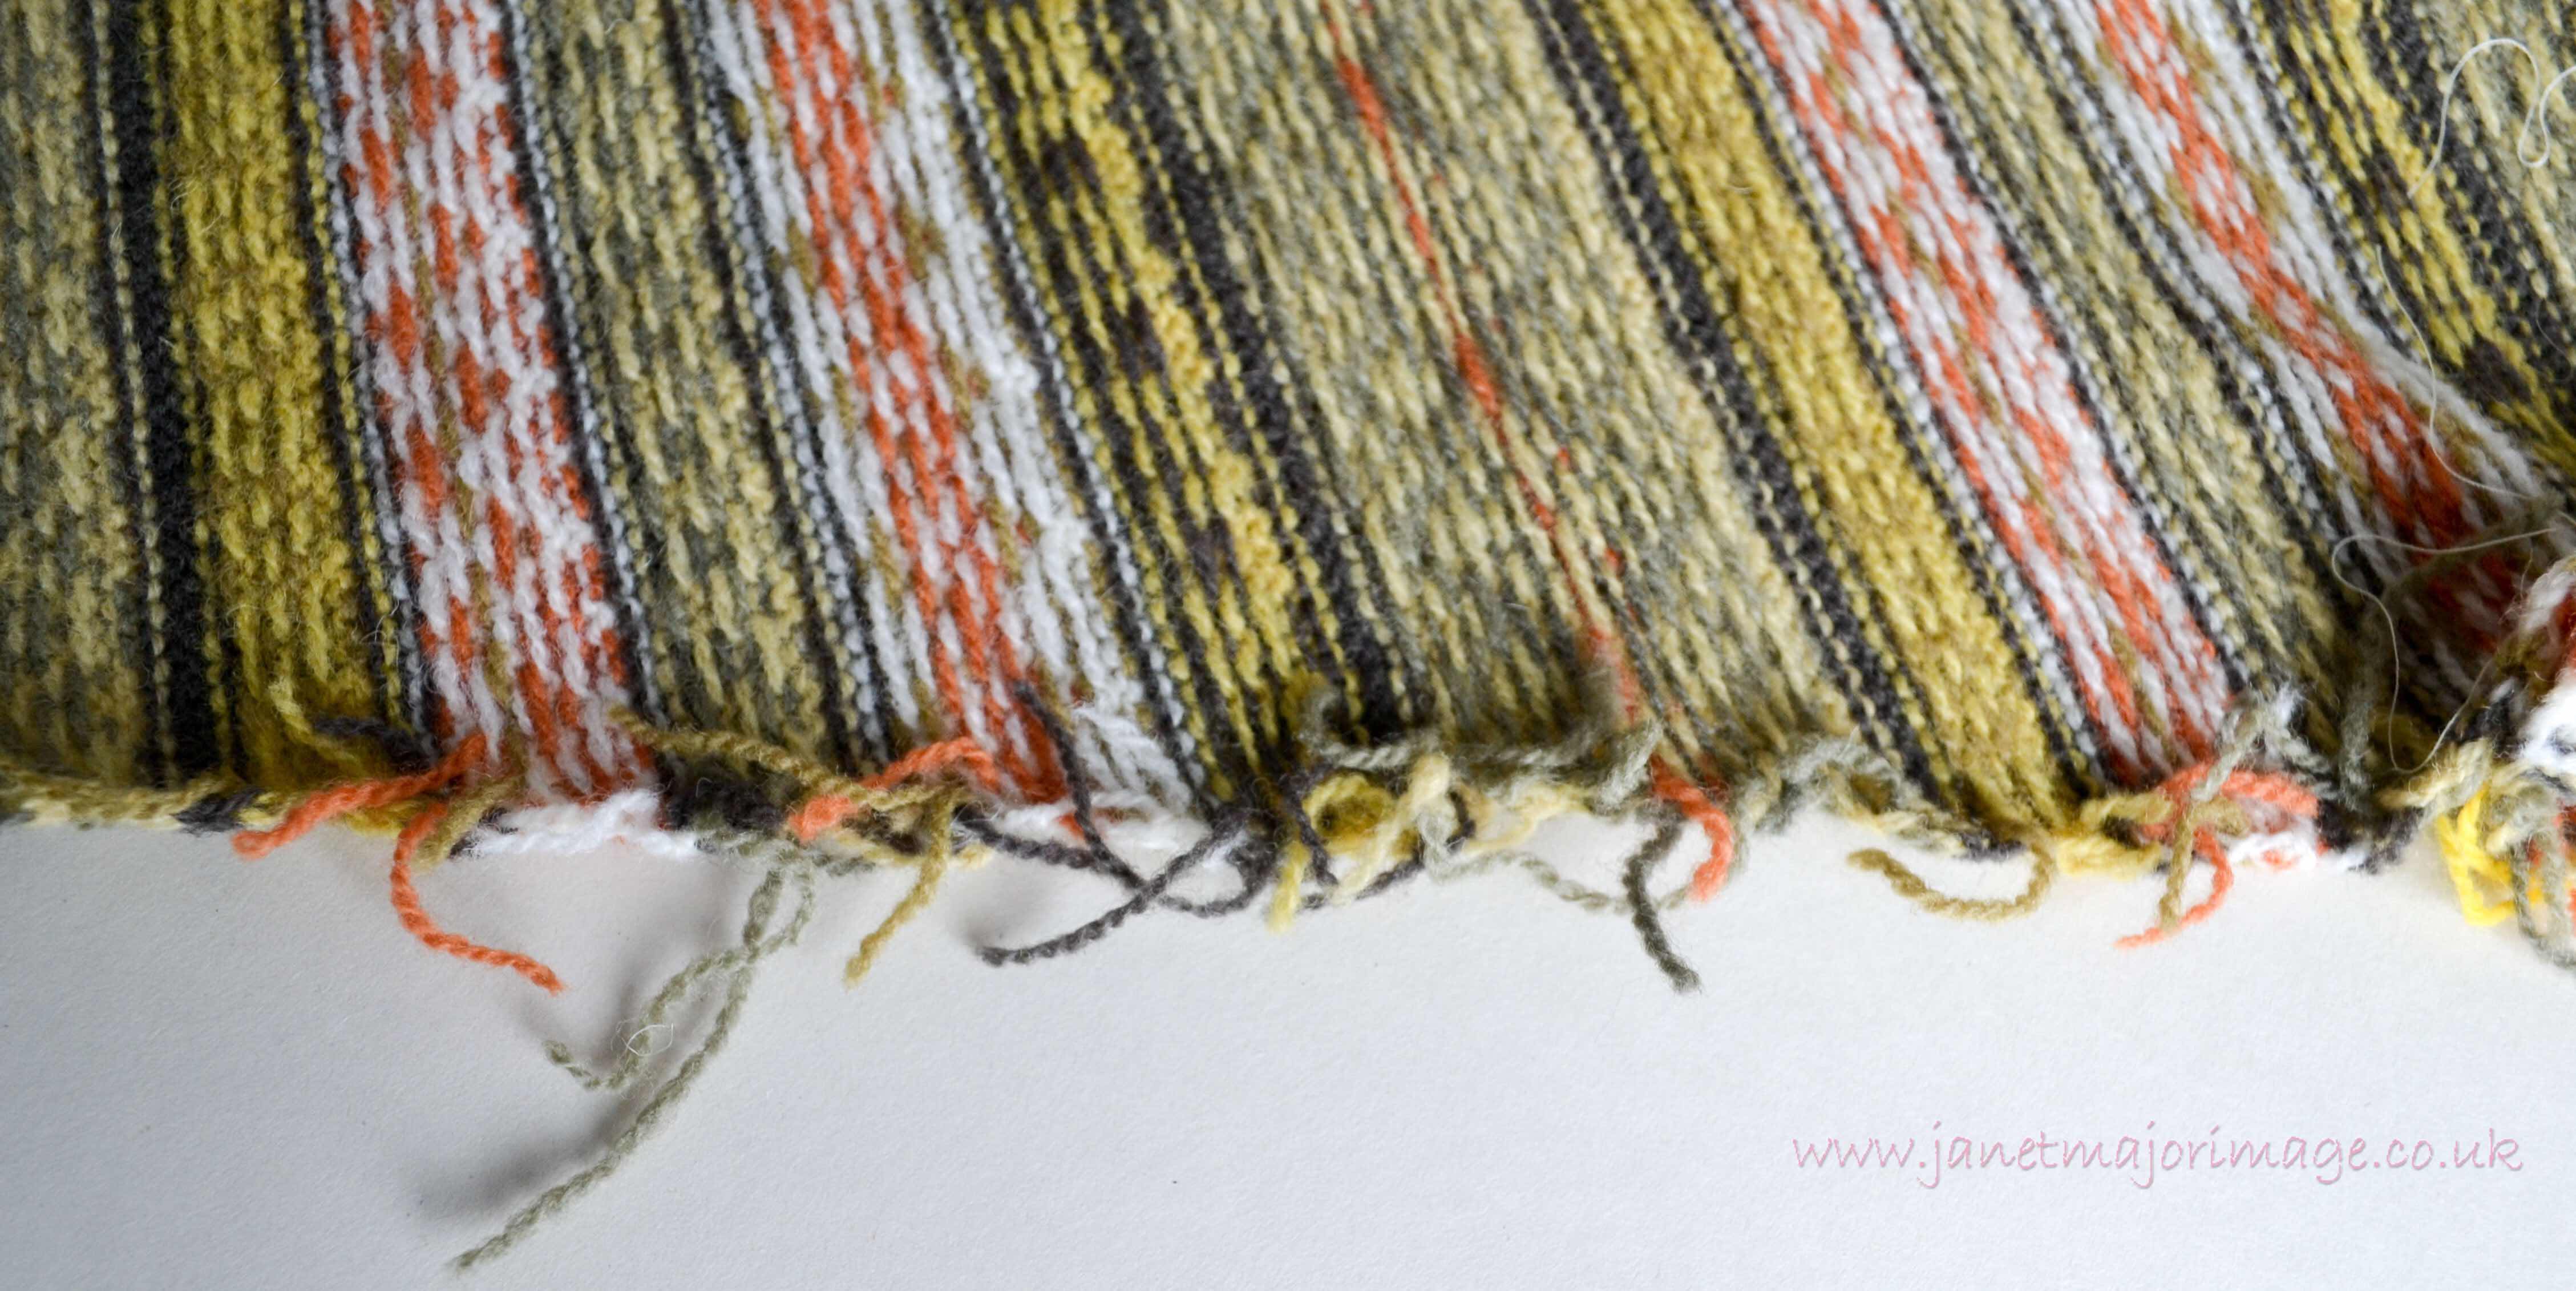
However, the making up calculation was an underestimate for this project. I split each of the waste yarns at the edges of the knitting and invisibly darned these in. I did a quick estimate of the time for this as I was doing them.... that came to 17 hours. In theory this is not needed when knitting with Shetland Wool as they are very unlikely to work loose. However, I wanted the inside to look as good as the outside.
Lots of ends to hide
Ends hidden, seam basted and machine stitched
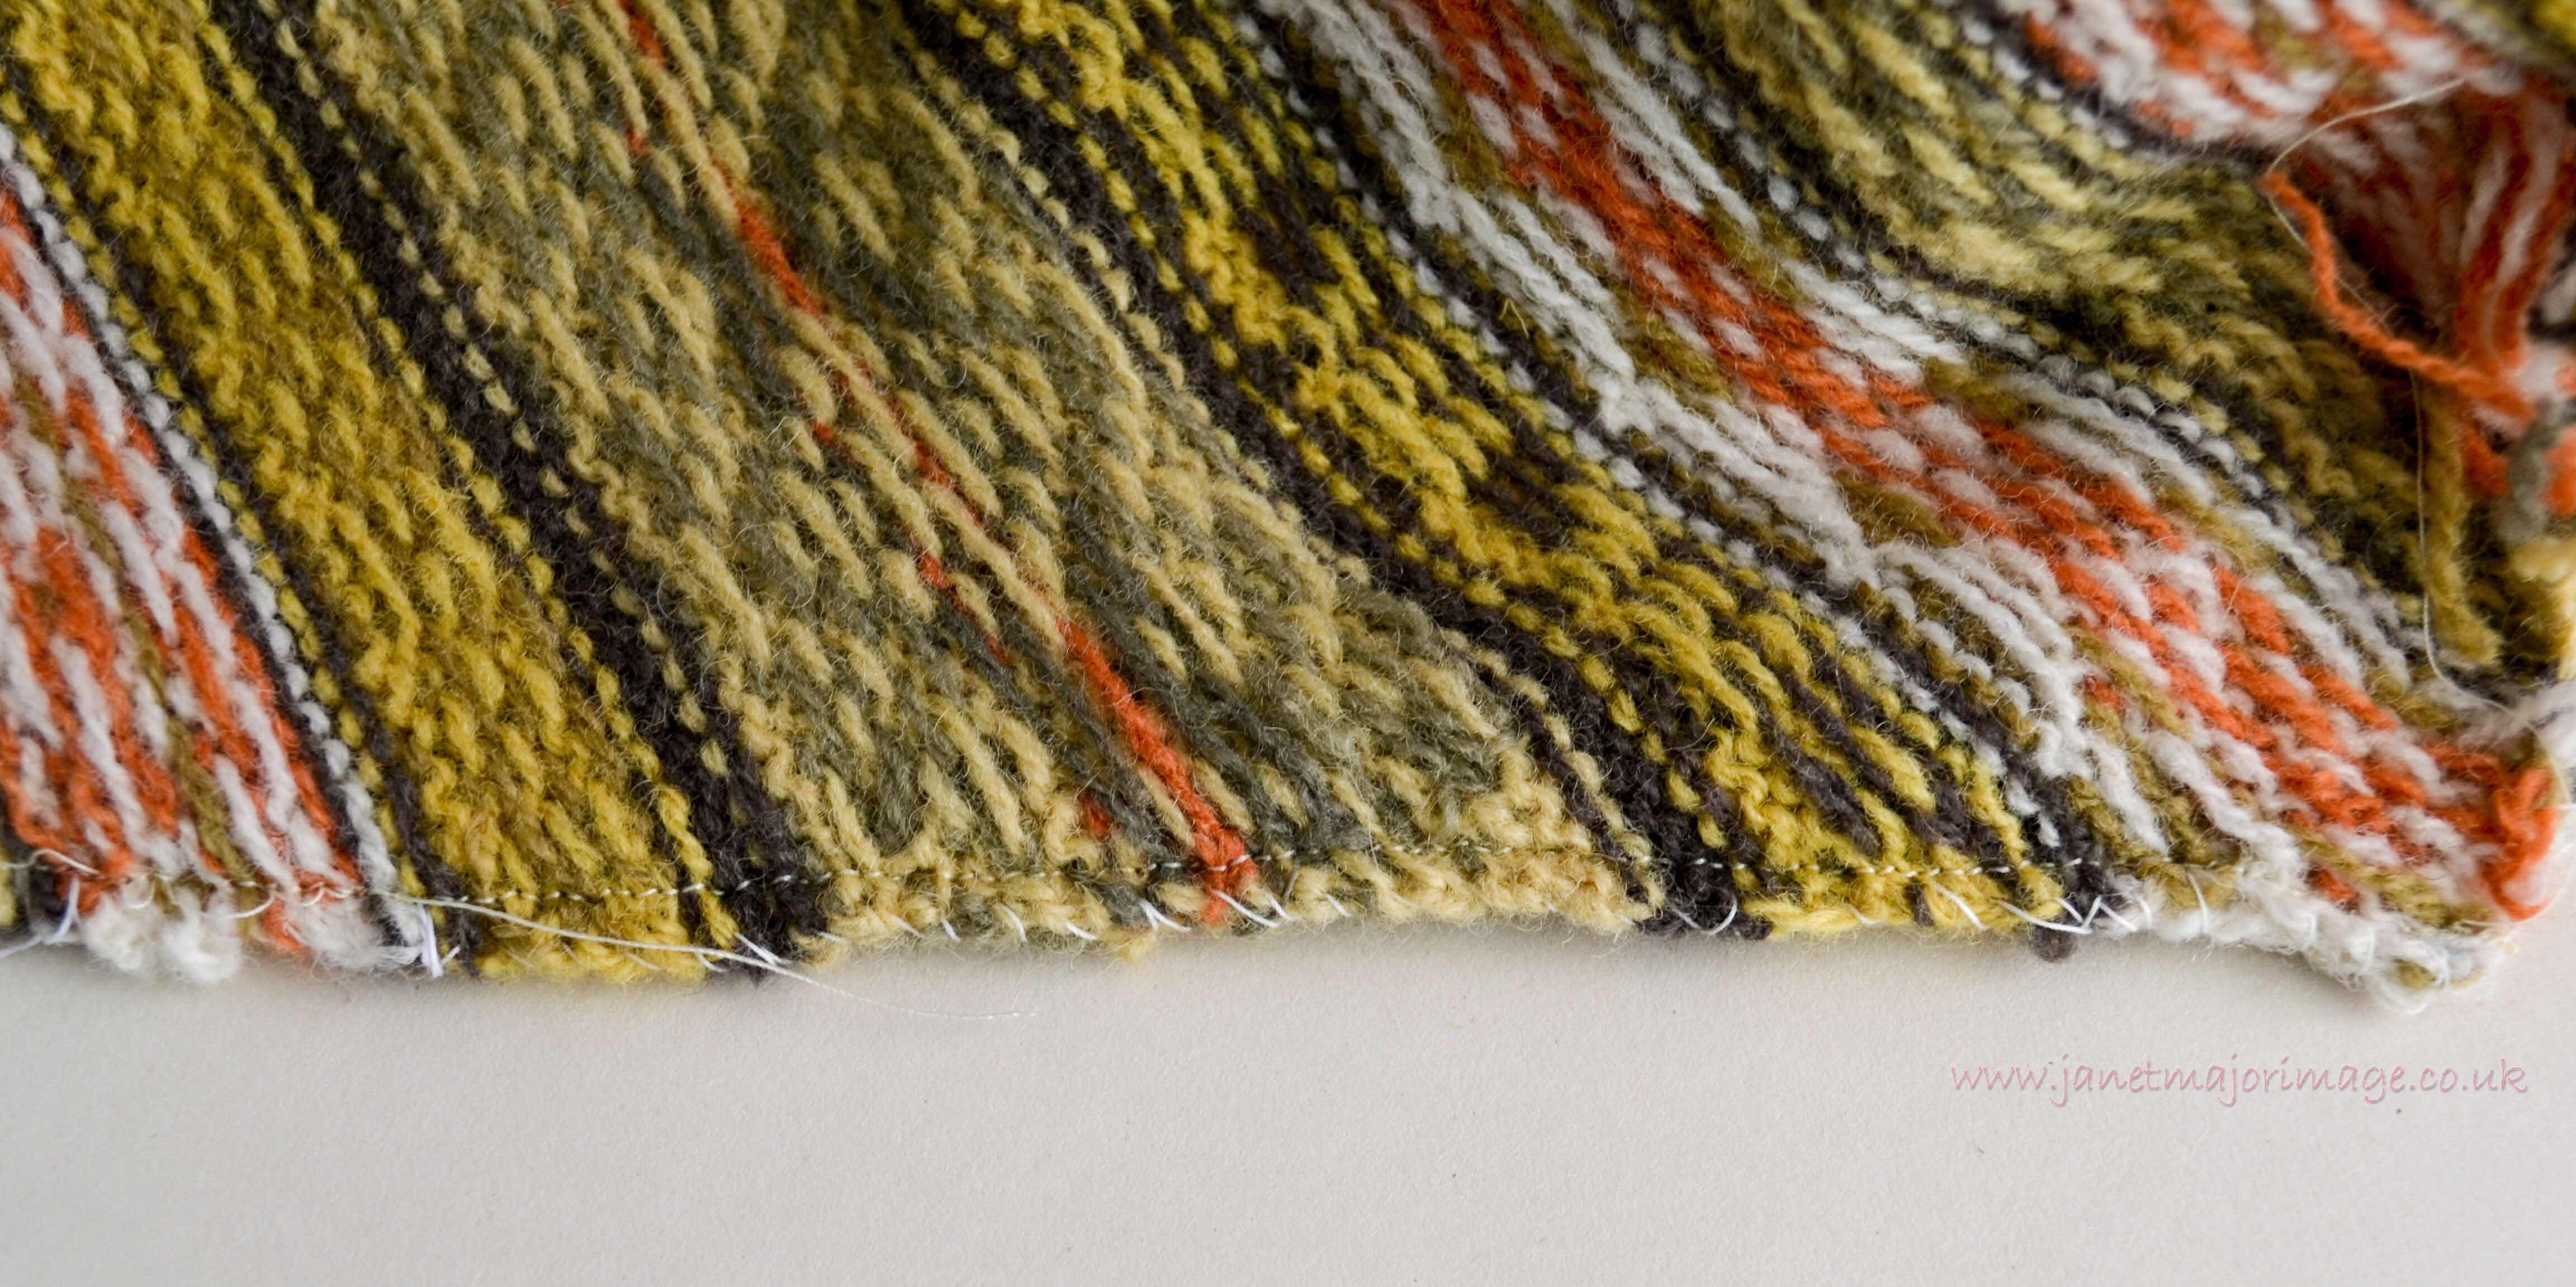
Being taught ‘whatever is worth doing is worth doing well’ has stuck since being told this as a child. Once the ends were fastened I basted the edges together by overcasting to match each of the horizontal logwood lines exactly. As always I stitched the pieces together, stocking stitch areas only, with a slight stretch stitch on my normal sewing machine. Ribs were hand stitched from the right side using a version of mattress stitch. Final steaming and pressing was done and voila the Ground Elder cardigan was complete.
Image of me wearing the completed cardigan
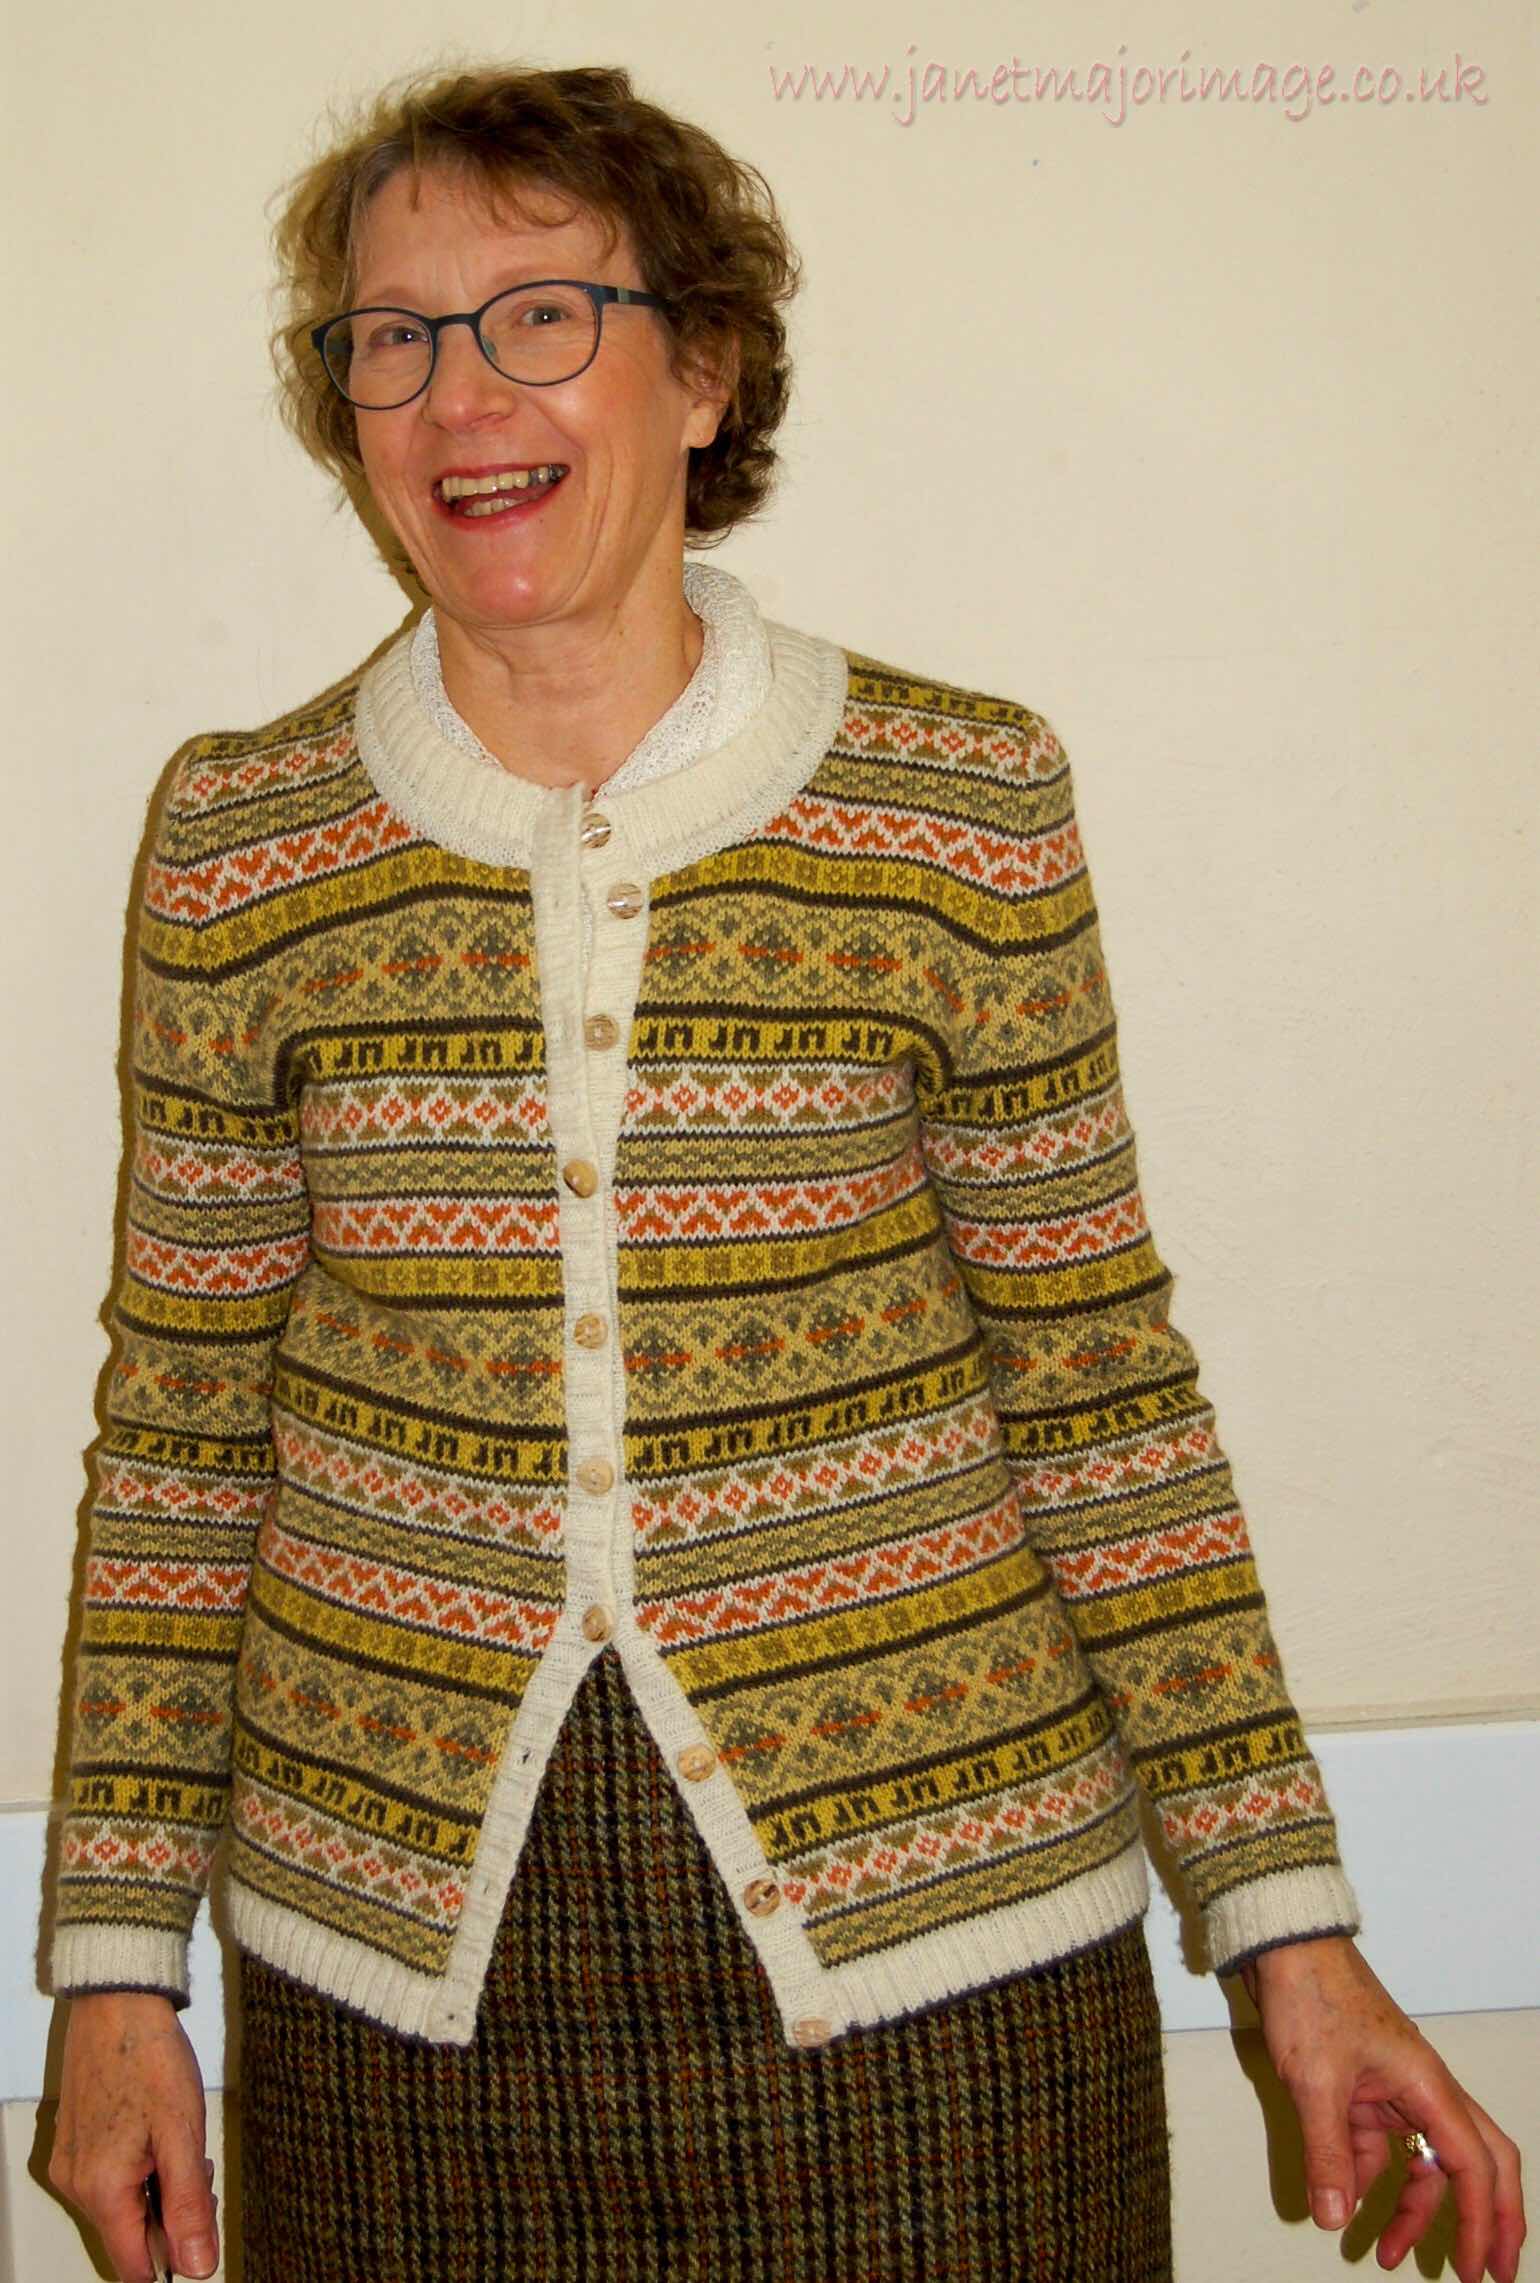
It had been a more challenging project than I had initially anticipated but I was pleased with it and best of all, I know I will never meet anyone wearing the same garment.
Many Thanks to Myra Ryan for introducing me to Natural Dyeing and to Helen Reynolds for managing to take a photo of me smiling!
So beautiful and skilled. It shows! The colours work so well together. How much does it weigh/yardage?
ReplyDeleteHaving had a knitting machine for a good 3 months, I know it's NOT as easy as one might think. In fact, you have to pay a lot of attention.
Literally GREAT work Janet
Beautiful.
ReplyDeleteThe cardigan (including buttons) weighs 380g.
ReplyDeleteA truly beautiful work of art (and science) Janet- stunning.
ReplyDeleteJoy x